Ultimate Water Heater Descaling Guide (Tank & Tankless)

If your water heater isn’t heating water as efficiently as it used to or making that popping or screaming sound, it may be time to descale it. Descaling (also known as flushing or deliming) is the process of removing mineral deposits from the inside of your water heater. It should be practiced bi-annually for soft water and every six to 12 month for hard water.
In this guide, we’ll teach you how to descale your water heater, whether it’s a tank or tankless model. It will help keep it running smoothly and efficiently and could potentially extend its lifespan. So let’s get started!
Why do we need to descale the water heater?
Hard water contains particles like calcium, magnesium, and also sand. Over time, these particles stack up on the base and sidewalls of water heaters called sediments or scales.
The problem is these scales reduce the water heating efficiency and can even block the flow of water. It can also fasten the corrosion of the water heater and that’s why we need to descale water heater to improve the heating efficiency and lifespan of the water heater. These scales also make popping noises.
Usually, water from sources like well is full of sediments and may require you to flush water more frequently. So it’s best to use water heaters ideal for well water.
Tank water heater: How to descale it?
Materials and tools required
1. Cut the supply
Start with safety first. Disconnect the electrical supply to the unit from the breaker panel. If it’s electric you will also want to shut off the gas supply through the valve. Also, switch off the main water supply to the water heater so no water is entering the tank.
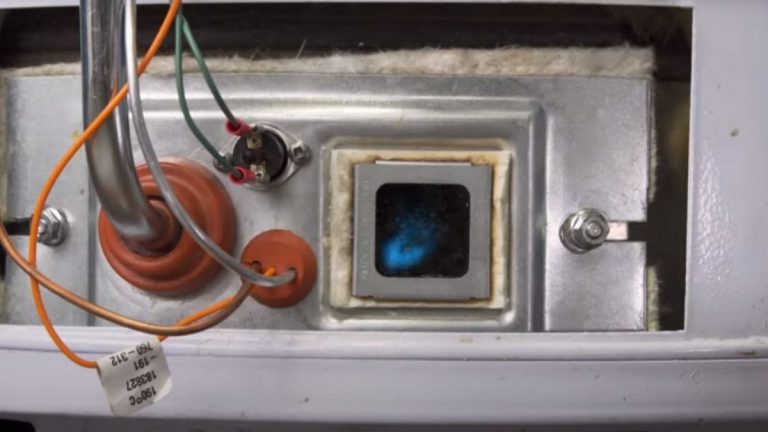
2. Remove the pressure relief valve or anode rod
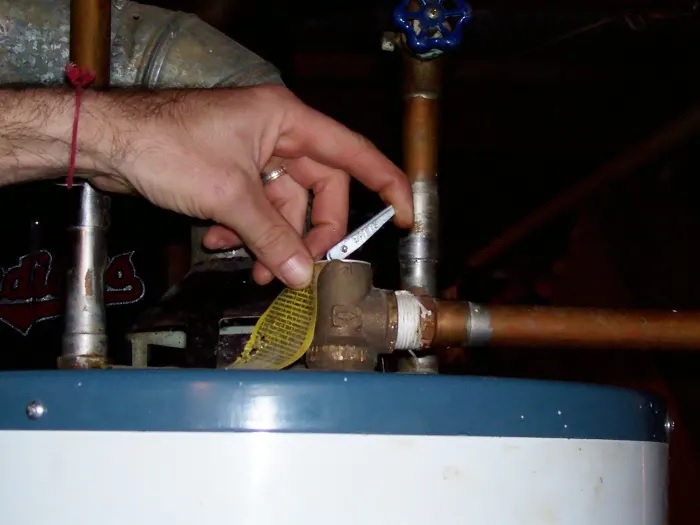
Now that we have disconnected everything including all supplies to the heater, we have to remove the pressure relief valve so it’s easy to flush and descale the tank. Be careful, the water inside is hot and you can let it cool.
Pull up the pressure valve to first release the pressure that’s inside. You can locate this valve on the side of the tank with a long pipe connected to it. You may hear hissing sounds and that’s normal.
Now take an adjustable wrench and unscrew the valve.
Alternatively, you can also remove the anode rod which has its bolt located on the top of the tank.
3. Drain the water in the tank
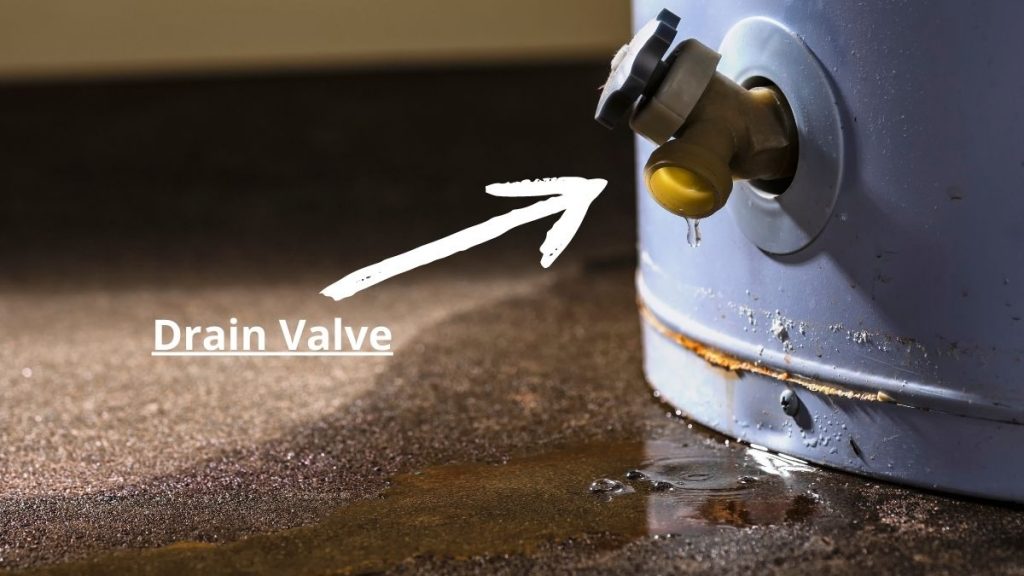
We have removed the pressure valve (or anode rod) now, which has created an airway through the tank.
Now take the hose and connect it to the drain valve that you can locate at the bottom side of the tank. Put the other end of the hose in a bucket or in the drain and open the drain valve.
The water should start to come out. If no water is coming out or flow is low then theirs sediment blockage. Take a hard or stiff wire piece and put it into the drain valve and move it around inside so the blockage can be opened.
Once unblocked, drain all of the water in the tank and close the valve.
4. Pour in the gallon of vinegar
Now is the main part. With the help of a funnel, pour the whole gallon of vinegar inside the tank via the pressure relief valve or anode opening. Depending upon the concentration of vinegar you bought, add an equal amount of water to the tank.
Let the solution sit in the tank for 2 hours.
5. Drain the scaling
All the solid scaling and sediments should have dissolved in the solution by now. So we have to drain it now. Open the main water valve and let the tank fill halfway and then close it.
Now connect the hose to the drain valve again and the other end to the drain. Open the drain valve and a milky and foamy liquid should be coming out.
Empty the whole tank and close the valve. Open the main water valve and fill the tank and drain again to rinse it a few times.
6. Screw back the valve or rod
Now we have cleaned the tank from the inside what’s left is to screw things back in. Take the Teflon tape and wrap a few folds on the threads of the pressure relief valve or anode rod and screw it tight back in its position with the help of the adjustable wrench.
7. Power on the supply and you are done
Once everything is put back in place, it’s time to restart the tank. Resume the power supply to the tank from the breaker panel and open the gas valve. Also, open the main water valve.
You have just descaled the tank water heater. Congrats on finishing such a big DIY task.
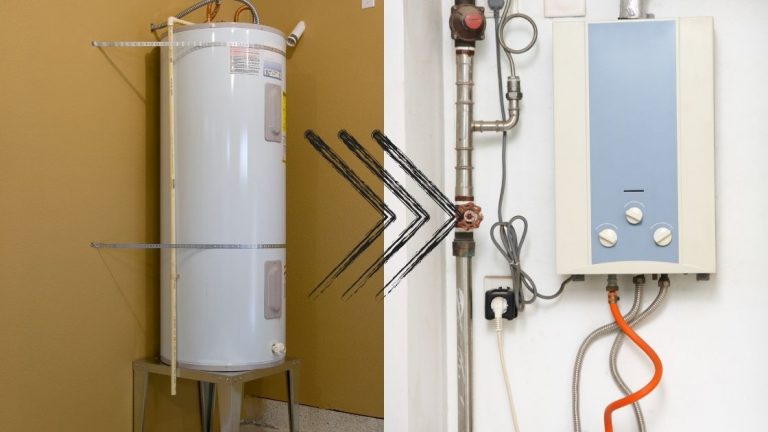
Tankless water heater: How to descale a tankless Nortiz, Rinnai, and Rheem?
Descaling and cleaning of both gas and electric tankless water heater are pretty much the same as they both have a heat exchanger that needs to be descaled. Let’s head straight to the procedure.
Materials and tools required
Side note
Make sure you already have service valves installed on the inlet and outlets of the tankless water heater. These are essential for flushing and descaling. If you don’t have them then get them installed first by the plumber.
1. Disconnect the supply and power
The first important and safety step is to ensure you have disconnected the power supply from the breaker panel. If you have a gas-fired unit then also close the gas valve.
Now through the service valve, close the cold water inlet and hot water outlet valves so no water enters or leaves the heater.
2. Release pressure and attach the hose
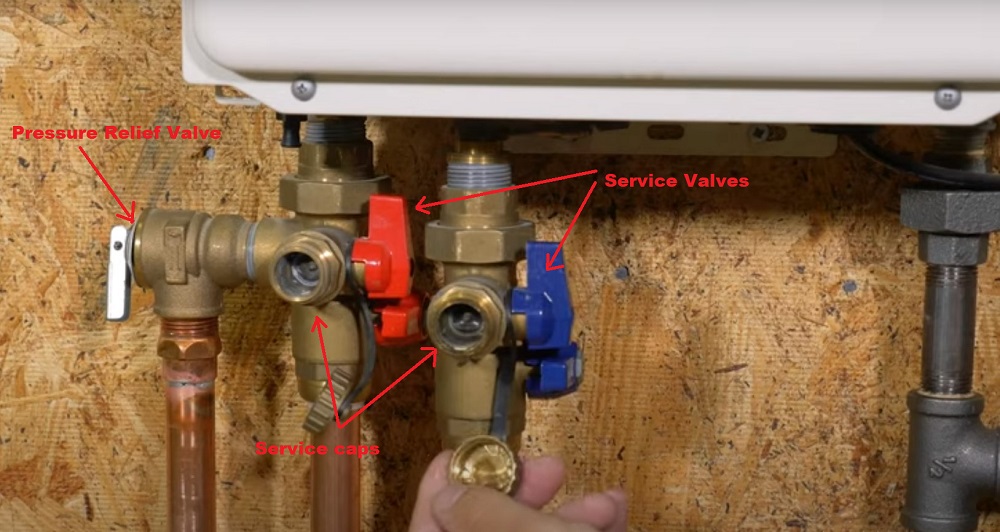
You should locate the pressure relief valve on the hot water valve side. Pull it up to release the pressure inside the tank. It’s possible you hear a hissing sound.
Now open the service caps of both inlet and outlets followed by opening the service valves. Some hot water may flow out of it.
Connect the other end of the submersible pump hose to the cold water service opening. Now connect one end of a different hose to the hot service opening. Put the other end of the hose and pump into the bucket.
3. Pour the vinegar solution into the bucket
Now pour the solution you got in the descaling kit into the same bucket and add water if instructed on the bottle.
4. Let the solution circulate through the heat exchanger for an hour
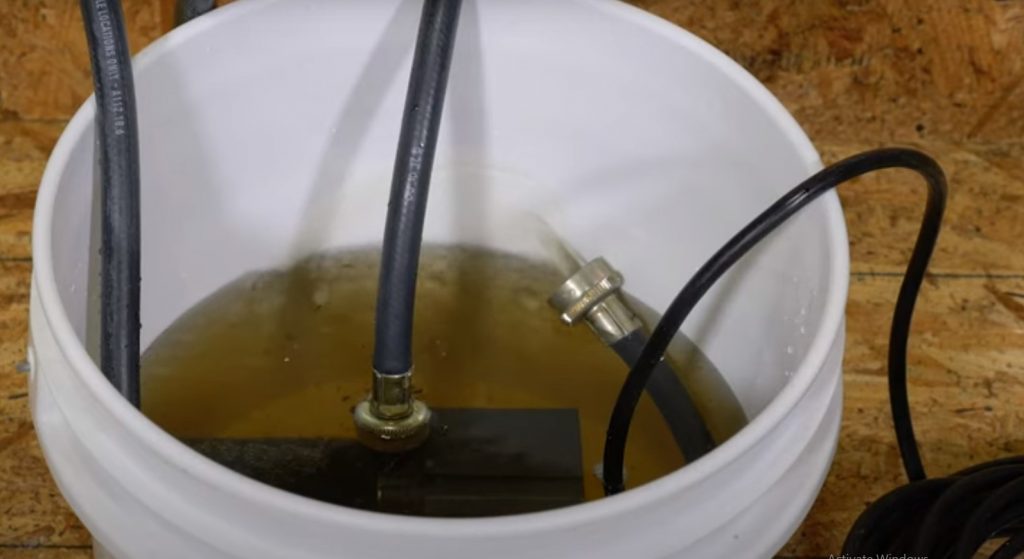
We added the vinegar solution to the bucket and connected the hoses. Now switch on the pump and let the vinegar or dissolvent flow through the heat exchanger for about an hour. It should dissolve and flush out all the sediment that has built up inside. And the solution should have gotten muddy
5. Dump the dirty solution and pour in some fresh water
Now stop the pump and dump the vinegar solution into the drain. Pour some water into the bucket. Make it half bucket and start the pump back. Let it circulate for about 5 minutes.
This will flush out any remaining vinegar solution and sediments.
6. Detach the hose and close the service valves
Now we have descaled the tankless water heater, what is left is to resume the operation. Remove the hoses. Close the service caps and service valves.
Open the water inlet and outlet valves. And resume the gas supply and power supply through the breaker panel.
Done! You have just finished the descaling and tankless cleaning DIY project.
Want to jump ship from tank to tankless? This guide will tell you everything from the expenses to expect to if the switch is worth it.
Over to you!
There you have it, a complete and easy-to-follow descaling guide for the tank and tankless model. It will help keep it running smoothly and efficiently and prolong its lifespan. If you have a water heater that is not performing as well as it used to or making strange noises, descaling may be the solution. Avoid maintenance and descaling for long can cause expensive damage to your appliance, including leakage in water heater tanks. If you are not getting hot water then check this guide out.
Frequently asked questions
How much does it cost to descale a tankless water heater?
It shouldn’t cost a lot. For first-time descaling, if you are doing it yourself, the descaling kit costs around 150$ and that should be it. For every descaling after that, you will only have to buy a gallon of vinegar as you will already have the kit. If you get it done through a plumber he may charge you upto 200$ every time.
How often to descale a tankless water heater?
How often to descale depends on the water’s hardness. If you have soft water or have a water softening system in place then you will only need to descale a tankless water heater once in five years.
But for hard water, you should descale your tankless water heater at least once a year.